How to Use an NX Monorepo? From Setup to Custom Generators
While I was writing an article about PDF generation I put a memo to publish my notes about the NX mono repo. It took me a while, but I finally had time to revise it.
It's a wonderful tool, but my motivation to use it faded after this incident. In short, they were hacked, and malicious versions were published. There's a great YouTube video about it, I highly recommend watching, as it's both informative and funny.
In short, they used AI code generation tools on the project.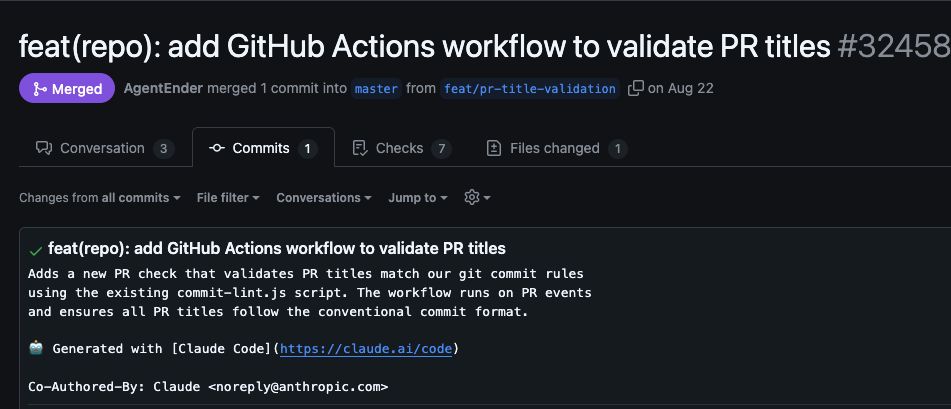
Before this incident, I didn't think much about how they develop it, and the Idea behind the tool is still great, but I don't think that any serious infrastructure tool should have such hollow processes allowing for the introduction of such bugs.
Here, I'm publishing my notes and thoughts on the tool. At the same time, I won't use it on any project until I see that they have much stricter policies, have stopped using AI for writing their code, and there are no competitors who offer the same convenience of use.
Monorepos are still great, I'll check a few more tools and write an article about them as well.
What Monorepos are?
If you're working as a developer for at least a little bit, you surely know what a repository is. Probably, you've heard about monolith applications and microservices as well.
Microservices are great, and they're usually implemented in separate repositories, allowing different teams to work on them independently. They can share resources by communicating through microservices and shared libraries. And it's very nice until it's not. It creates a level of complexity that lots of development teams may not actually need. On that note of over-complexity, Mono repositories come into play. You have separate projects with strict boundaries, but they are all part of the same repository. You can publish those projects separately, make shared projects like a UI kit without the need to publish them anywhere. Additionally, if you want to adopt a microfrontend approach, then a monorepo is the best way to structure your project from the start.
Why NX?
Because NX is simple to use and offers a wide range of tools, I tried multiple solutions(Turbo repo, Lerna) before, and NX is the only one that just worked from the start. I generated a Next.js project using their generators, and it just worked.
In addition, NX has a large number of different generators, tools, and excellent documentation.
How to get started?
You need to run just one command and that's it
npx create-nx-workspace@latest --preset=next --pm yarnI strongly suggest to use anything except npm for NX. In --preset you can use any supported preset of NX. I didn't find a complete list of presets in their documentation, it's probably the name of the framework you want to use. Their AI chat does not seem to help here🙂.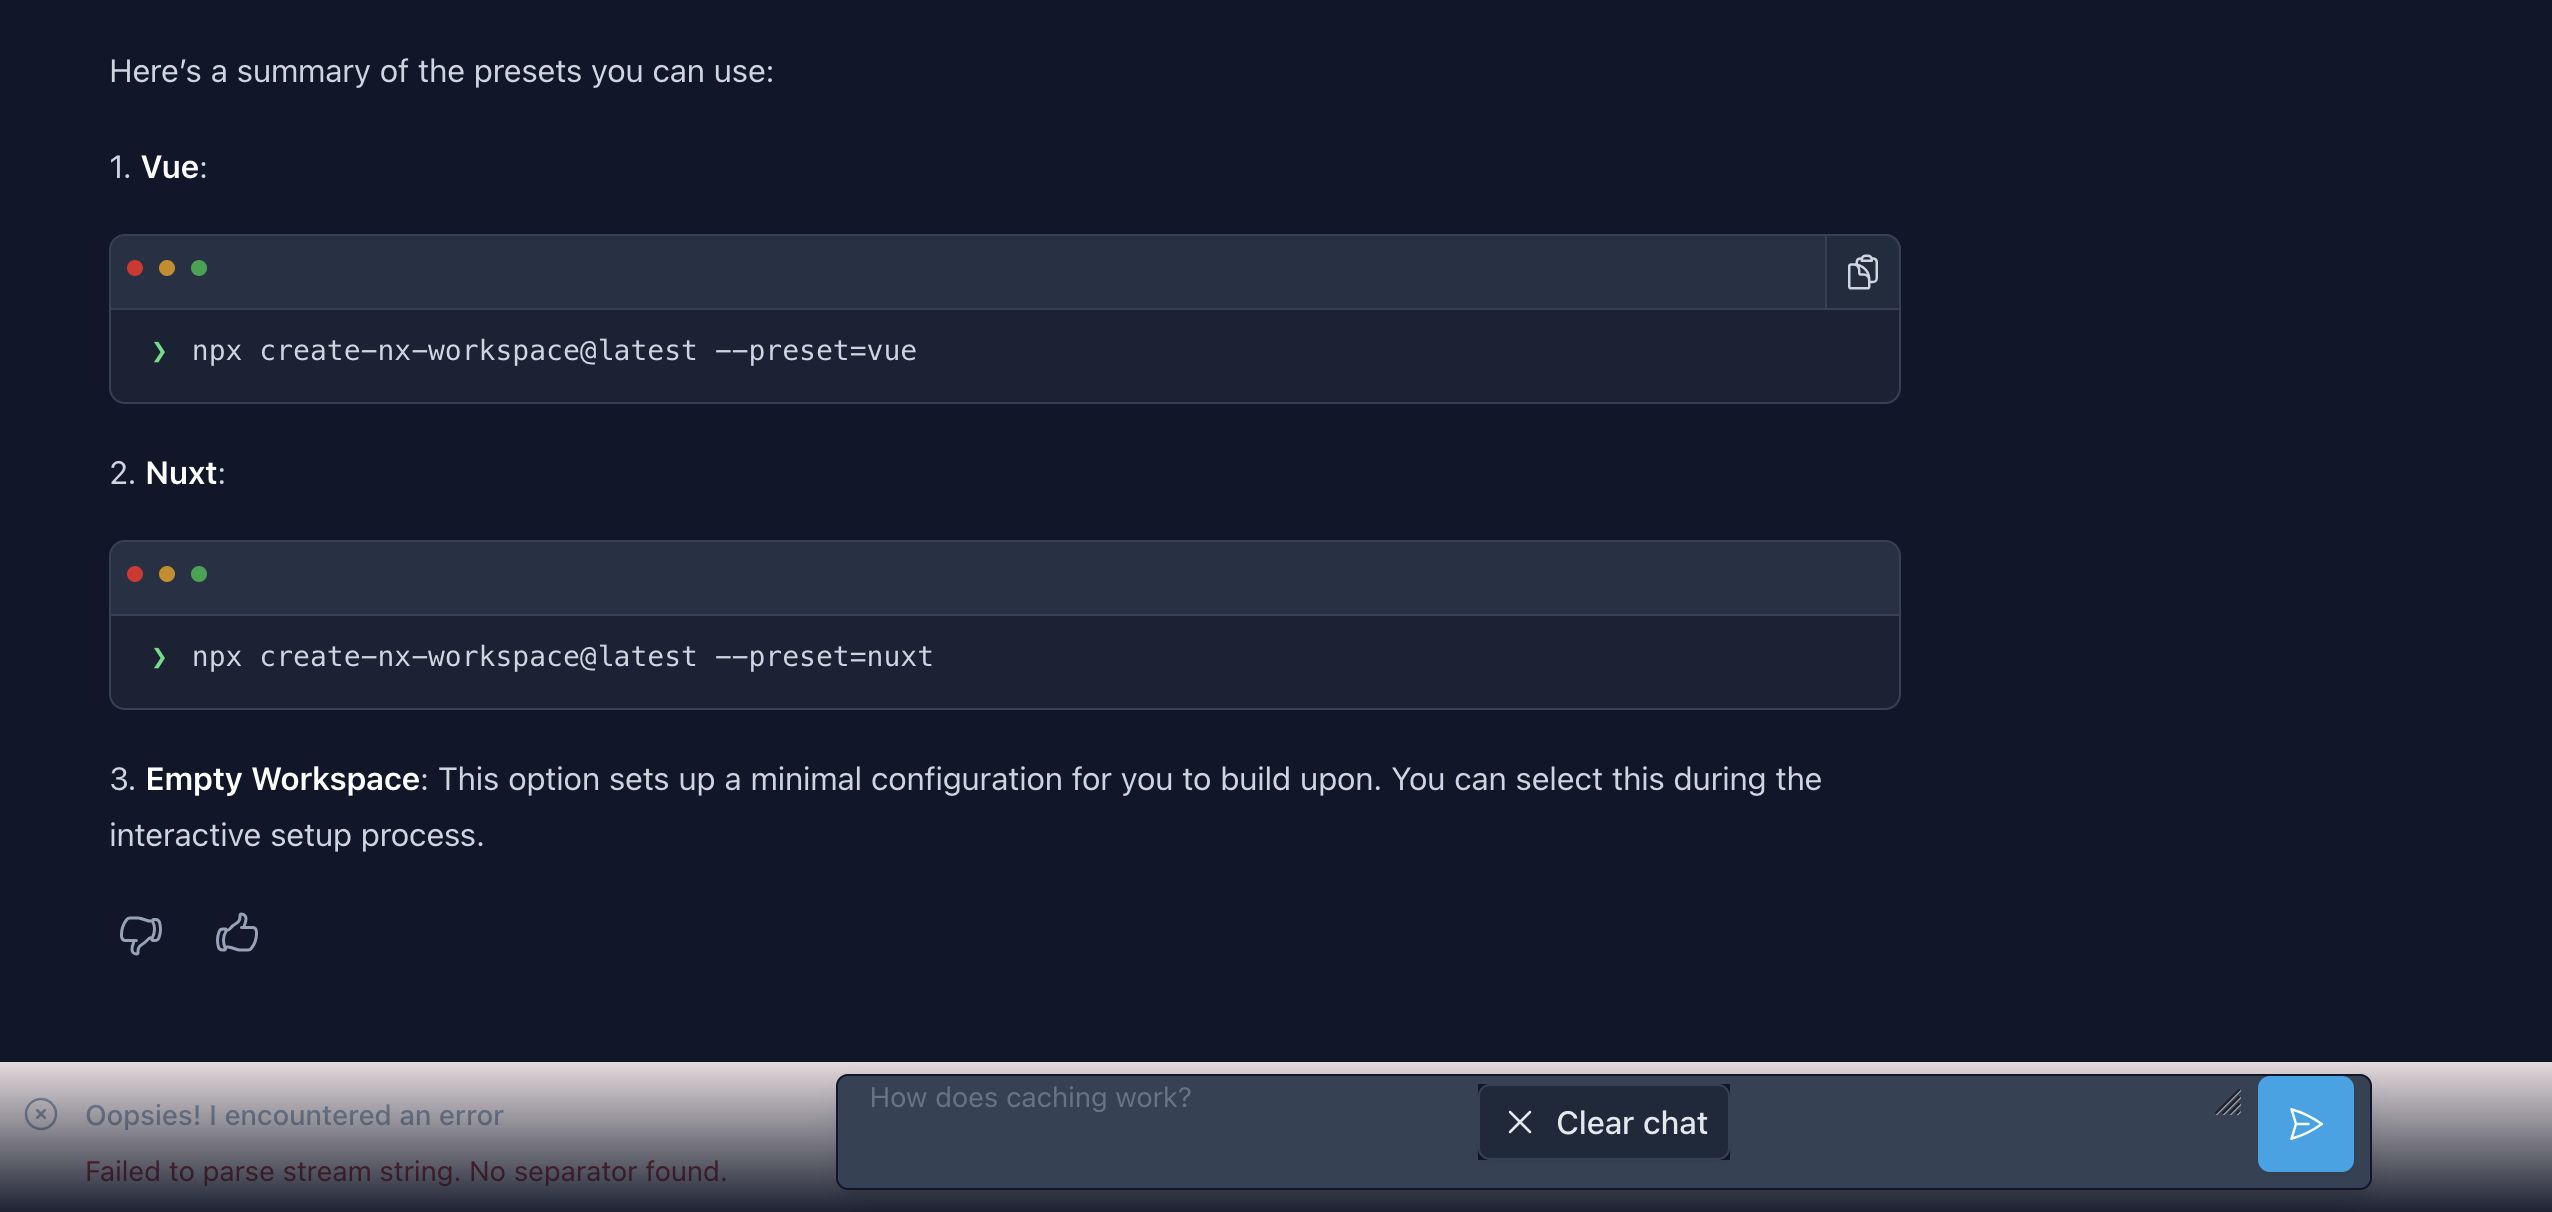
After running the command, you'll have a walkthrough with questions about the configuration you want to have
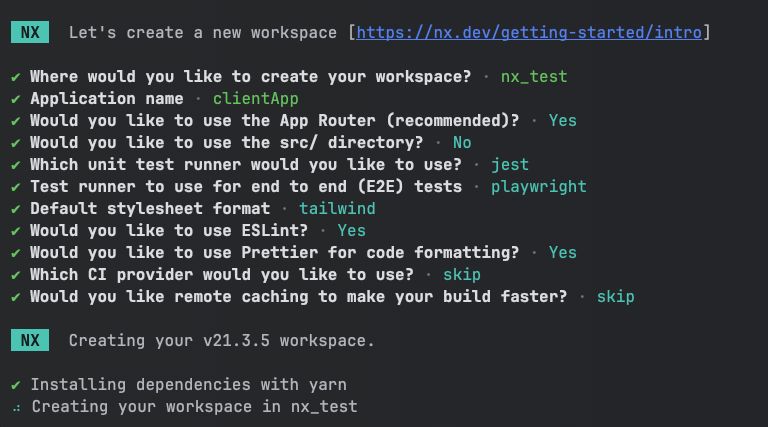
New project setup is done in a few minutes with full configuration, you can just concentrate on the work you need to do.
Also It's better to install NX console into your editor. Documentation is here
After installation of the workspace and NX Console, you have an apps folder with applications that you configured in the wizard. I used the name clientApp for the screenshots, but you can refer to the configuration in this repo.
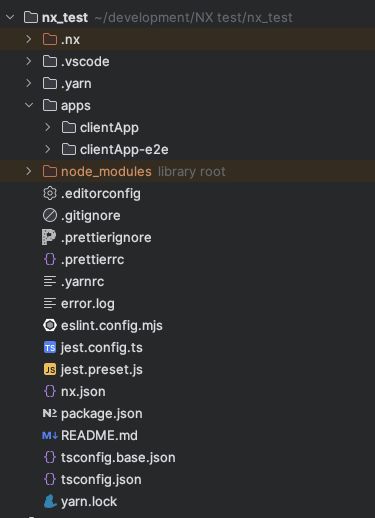
And in NX console you have all of the commands that you usually put in package.json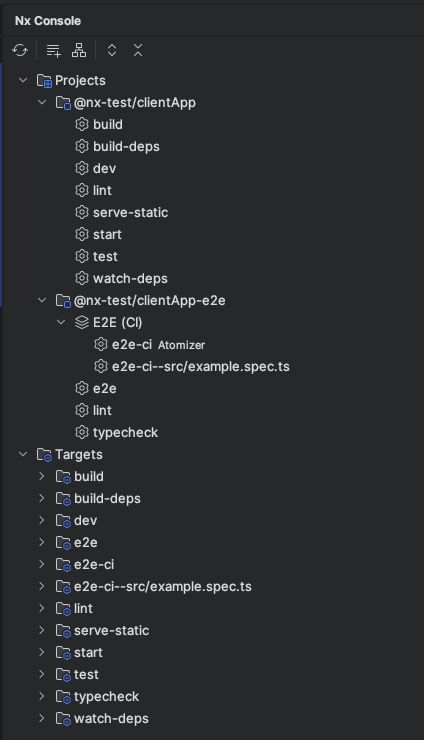
All of those commands are from the applications that you have. You won't find them in the package.json(it's empty). Base running scripts are inherited from NX. You can find a hint of information in nx.json and its usage of plugins with mapping of commands.
{
    "plugin": "@nx/next/plugin",
    "options": {
        "startTargetName": "start",
        "buildTargetName": "build",
        "devTargetName": "dev",
        "serveStaticTargetName": "serve-static",
        "buildDepsTargetName": "build-deps",
        "watchDepsTargetName": "watch-deps"
    }
}
Recommended actions after installation of JS-based projects
I use WebStorm, and this checklist is certainly relevant to those who use it.
- Enable Prettier in the editor
- Enable EsLint in the editor
- Check for type errors. To make sure that TS works. I spent quite some time without type-checking until I realized that it doesn't work out of the box sometimes
- Install Storybook for components. Optional, but I like it
Also, you can use NX code generators to add more applications to your mono repo(because it's the point of having it). Let's add an app named adminApp and a shared UI library
nx g @nx/next:app apps/adminApp
nx g @nx/next:lib libs/sharedUI
The magic here is that NX automatically adds required configurations so if you use sharedUI library in 2 projects, it will know to rebuild this library on change and update your applications. You don't need to do anything special, it just works.
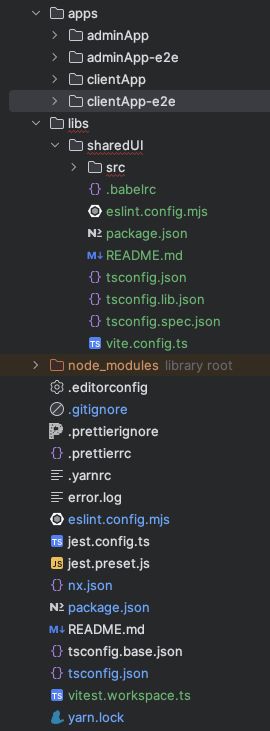
As you can see in the project files, we added a new application adminApp, e2e tests, and shared UI library. Project files were updated to make the workspace aware that there are new projects
Additionally, a significant advantage of mono-repo setups is that all your projects and libraries can have completely standalone and separate dependencies.
But you can't use just
yarn add {package name}Because you want to install it into a workspace.
There are 2 commands that you need to know
yarn workspaces infoIt shows you a list of all workspaces that you have and
yarn workspace {name of a workspace} add {package name}This is the command to install a package into the workspace.
Installation of Storybook
There are actually two ways you can install Storybook in your mono repo
- One storybook for the whole mono repo
- Separate storybooks for applications/libraries.
One Storybook to rule them all
I didn't explore this path, but I saved an article on how to do it.
Separate Storybook for UI library with tailwind
I love to have Storybook on my projects. It's a clean and easy way to look into components in isolation and even reproduce some scenarios that are difficult to reproduce.
In order to setup Storybook, you need to add it to your workspace first by using the next command
nx add @nx/storybookOnce you have added it you need to add Storybook configuration to the desired project
nx g @nx/storybook:configuration {project-name}and optionally add Tailwind.css to it
nx g @nx/react:setup-tailwind --project={project}
Add a css file in .storybook folder, import this css file in preivew.ts, and paste css code bellow into the css file
@tailwind base;
@tailwind components;
@tailwind utilities;
After that all you need to do is to write stories for your components.
For any story file you can use the next template
import { Meta, StoryObj } from '@storybook/react';

import Component from './Component';

const meta: Meta<typeof Component> = {
  component: ${Component},
};
export default meta;

type Story = StoryObj<typeof Component>;

export const Example: Story = {};
or you can use NX generators to do the same
nx g @nx/react:component-story ...
Example for button component
nx g @nx/react:component-story --componentPath=lib/Button/Button.tsx --project=sharedUI --no-interactive --dry-runYou can always run Storybook from NX CLI
Custom code generators
Existing generators look nice, but may not play well with the style that you want to follow. For example, you have your own templates, architectural logic, and style of placing, using, and reimporting components.
To get started, you need to create a plugin
nx add @nx/plugin
nx g @nx/plugin:plugin tools/{plugin name}
After that we need to create a generator
nx generate @nx/plugin:generator tools/{plugin name}/src/generators/{generator name}You will have a folder structure like that
|Tools
  |{name of the plugin}
    |src
      |generators
        |{name of the generator}
          |generator.spec.ts
          |generator.ts
          |schema.d.ts
          |schema.json
          |*some more config files()
          |files #place where all your template files would be stored
            |src
              |index.ts.template
And I couldn't figure out why I always generated new code with the src folder, but I figured out that this generator would generate EXACTLY the same file structure as in the files folder. So if you want to avoid having an unnecessary src folder, you need to change the folder structure to be
|Tools
  |{name of the plugin}
    |src
      |generators
        |{name of the generator}
          |generator.spec.ts
          |generator.ts
          |schema.d.ts
          |schema.json
          |*some more config files()
          |files #place where all your template files would be stored
            |index.ts.template
So removing src folder does the trick.
We created a default code generator. For the next steps, I want to do
- Generate a new client or server component in the UI library.
- Generate storybook and test files
- Generate Folder and re-export components from the project
You need to place template files in files directory. This way the plugin will know to use them, process them, and put them in the desired destination.
I created following template files
index.ts.template
export * from './<%= name %>'__name__.tsx.template
<% if(type === "server") {%>'use server';<% }%>
<% if(type === "client") {%>'use client';<% }%>

function <%= name %>() {
  return (
    <div>
      <h1>Welcome to <%= name %>!</h1>
    </div>
  );
}

export default <%= name %>;
__name__.stories.tsx.template
import type { Meta, StoryObj } from '@storybook/react';
import <%= name %> from './<%= name %>.tsx';

import { within } from '@storybook/testing-library';
import { expect } from '@storybook/jest';

const meta: Meta<typeof <%= name %>> = {
  component: <%= name %>,
  title: '<%= name %>',
};
export default meta;
type Story = StoryObj<typeof <%= name %>>;

export const Primary = {
  args: {},
};

export const Heading: Story = {
  args: {},
  play: async ({ canvasElement }) => {
    const canvas = within(canvasElement);
    expect(canvas.getByText(/Welcome to <%= name %>!/gi)).toBeTruthy();
  },
};
__name__.spec.ts.template
import { render } from '@testing-library/react';

import <%= name %> from './<%= name %>.tsx';

describe('<%= name %>', () => {
  it('should render successfully', () => {
    const { baseElement } = render(<<%= name %> />);
    expect(baseElement).toBeTruthy();
  });
});
__name__ is a template for the file name, and you would get it from user input. In the same way, any other parameter would appear in your file template that a user passes.
In schema.json, I added an additional parameter to ask type
{
    "$schema": "https://json-schema.org/schema",
    "$id": "UiComponent",
    "title": "",
    "type": "object",
    "properties": {
        "name": {
            "type": "string",
            "description": "",
            "$default": {
                "$source": "argv",
                "index": 0
            },
            "x-prompt": "What name would you like to use?"
        },
        "type": {
            "type": "string",
            "description": "Provide the component type",
            "x-prompt": {
                "message": "Which type of component would you like to generate?",
                "type": "list",
                "default": "none",
                "items": [
                    {
                        "value": "client",
                        "label": "client"
                    },
                    {
                        "value": "server",
                        "label": "server"
                    },
                    {
                        "value": "none",
                        "label": "none"
                    }
                ]
            }
        }
    },
    "required": ["name"]
}
In schema.d.ts I updated types
export interface UiComponentGeneratorSchema {
    name: string
    type?: 'client' | 'server' | 'none'
}
And finally, I updated the generator file to be
import { formatFiles, generateFiles, Tree } from '@nx/devkit'
import * as path from 'path'
import { UiComponentGeneratorSchema } from './schema'

export async function uiComponentGenerator(
    tree: Tree,
    options: UiComponentGeneratorSchema
) {
    const indexFile =
        options.type === 'server'
            ? 'libs/sharedUI/src/server.ts'
            : 'libs/sharedUI/src/index.ts'
    const projectRoot = `libs/ui/src/lib/${options.name}`
    const importPath = `./lib/${options.name}`

    /*update files index.ts or server.ts files for re-exports*/
    const existingContent = tree.read(indexFile, 'utf-8')
    const updatedContent = `${existingContent}\nexport * from '${importPath}';`
    tree.write(indexFile, updatedContent)

    generateFiles(tree, path.join(__dirname, 'files'), projectRoot, options)
    await formatFiles(tree)
}

export default uiComponentGenerator
So I update the index files and generate files in the desired folder
You can use it in the same way as any other generator in NX
nx g @{project name}/{plugin name}:{generator name} --name=test --type=serverAlternatively, you can use the NX CLI for this purpose.
Outro
That's it. I shared some basics of NX with you; I hope it was helpful. Also, I highly recommend checking their documentation.